Porting Capy to Android
by Zen1th
It’s been quite some time on my roadmap that I wanted to port Capy to Android. And recently, I wanted to start a side project that I would code in Zig but that needs to be an Android app. So, might as well start porting Capy just now.
Prior efforts
By searching a little, I found this amazing project called ZigAndroidTemplate. It probably saved me months of coding, debugging and demotivation as it provided features such as generating the keystores, installing the app and running the app. This is essentially everything that’s required to get started on Android!
![]()
It even provides a barebones Android API that wraps native activity and an example of how to use the API.
Android is based on the concept of activities. An activity is simply a class that’s instantiated and that will handle the lifecycle and the content of your current screen. For instance, the home screen of an app is an activity. In a messaging app, clicking on a contact to see its page would open a new activity.
What ZigAndroidTemplate uses is a native activity, which is simply an activity implemented using native code (C/C++/Zig/…). However, the fact that it uses native activity is also a problem, because native activities are meant to be used in games or for other things that are rendered. To achieve this, it locks the screen output and the input, preventing views (= android native widgets) from being displayed. The problem is, I use native widgets in Capy. This makes it a huge problem.
Cheating a little
So, I need to find a way to use native widgets even though they’re blocked. I’ve searched through all of the NDK documentation and couldn’t find anything resembling a ‘unlock screen’ or ‘set content view’.
Desperate for anything, I started looking at the source code of NativeActivity. It calls getWindow().takeSurface(this). Bingo!
Let’s look at the documentation of Window.takeSurface:
Take ownership of this window’s surface. The window’s view hierarchy will no longer draw into the surface, though it will otherwise continue to operate (such as for receiving input events). The given SurfaceHolder callback will be used to tell you about state changes to the surface.
Dang, it doesn’t say how to give back the ownership that native activity took away. Fortunately, we’ve got one obvious solution: looking at the source code for answer (I would like to thanks Zig for making me used to reading good standard library code)
After some debugging, I found out that the Window that activities use really is com.android.internal.policy.PhoneWindow and not android.app.Activity.
Once we get the class name, it becomes quite simple: just look at the source file and search for takeSurface and..
public void takeSurface(Callback2 callback) {
    mTakeSurfaceCallback = callback;
}
It turns out it doesn’t do any sort of assertion or nullability check, which is a good thing for me. Using this (undocumented) behaviour, I can remove the surface callback by just doing takeSurface(null), and do the same for the input queue using takeInputQueue(null).
We just removed all the bad defaults set by NativeActivity!
Except it doesn't work.

Turns out you need to also set a content view (the widget we want to display). Well yes, even if the content view can now be displayed, if we don’t have a content view there’s no point in that.
Interfacing with Android views
A view is how Android calls its native widgets.
No need to look further. Android views can only be created in Java. In fact, they’re coded in Java Fortunately, we’re provided with a system that allows us to communicate with Java objects: the dreaded JNI. Java Native Interface.
In a nutshell, the JNI is a system that allows you to write the following Java code
TextView view = new TextView();
as the following Zig code
const TextView = jni.findClass("android/widget/TextView");
std.log.warn("Found android.widget.TextView", .{});
const textViewInit = jni.invokeJni(.GetMethodID, .{ TextView, "<init>", "(Landroid/content/Context;)V" });
const textView = jni.invokeJni(.NewObject, .{ TextView, textViewInit, self.activity.clazz });
!!!
In an effort of readability and in order to preserve your sanity, I will only be showing the equivalent Java code of what I’m doing. I think you can understand why. If still you really want to look at how it is, you may still check the source code.
// Just create a new label with text 'Hello from Zig!'.
TextView view = new TextView();
view.setText("Hello from Zig!");

// This does what we described earlier
Window window = this.getWindow();
window.takeSurface(null);

// But this time we also add our own view..
window.setContentView(view);
And believe it or not, it’s enough to get something that shows up!
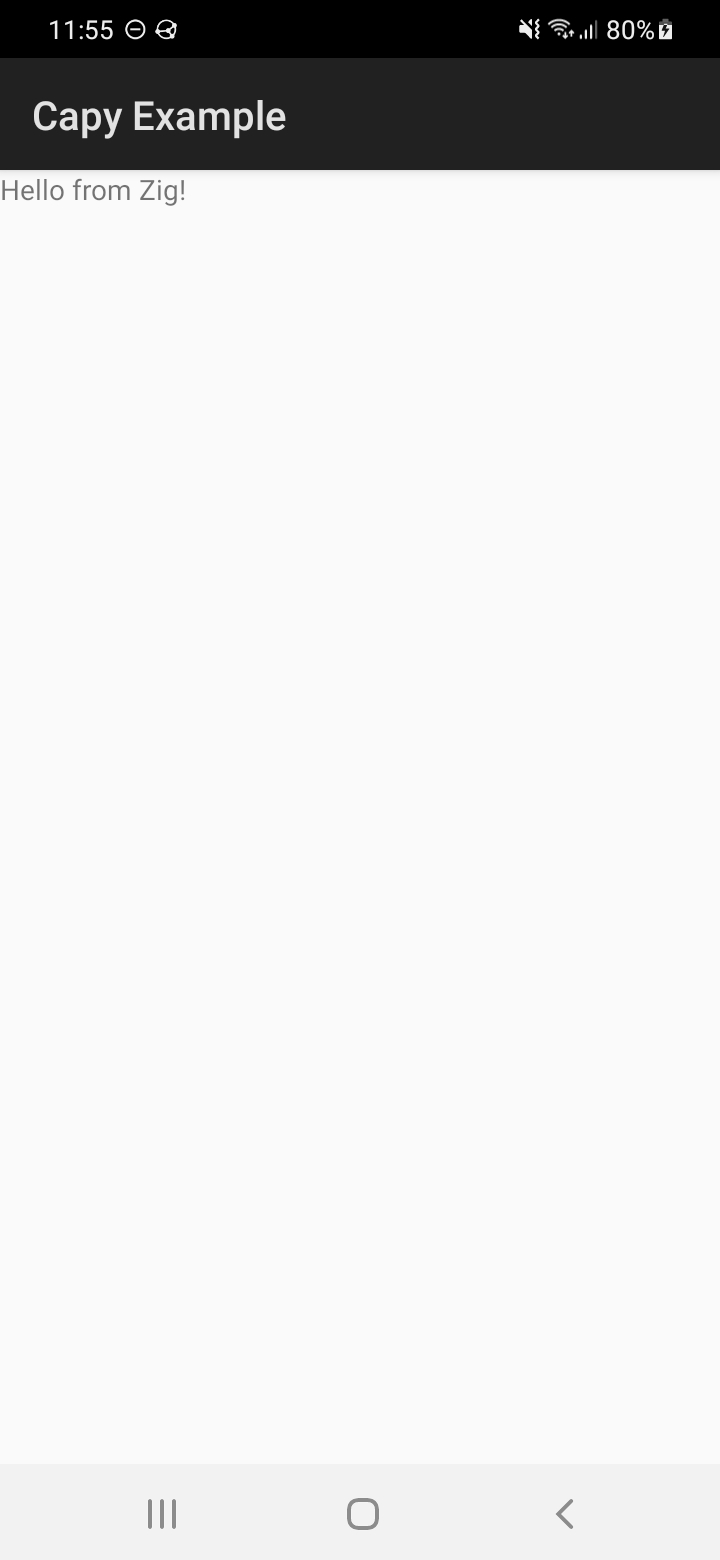
Hurray!
Integrating with Capy
So far, we managed to display a view using only native code. But let’s avoid forgetting that there’s still the biggest work remaining: actually integrating with Capy.
Measuring size
Most UI libraries need to layout their widgets. This is fancy term for saying positioning them on the screen and giving them a size.
To do that, Capy needs to know what is the size of a component in order to layout it. After all, how to make the best use of a space if you don’t know how much space you have.
For that, you need to call measure() on the container that contains the component, and you need to do it every time you resize a component. measure() will magically do the layouting for us.
Then, you can use getMeasuredWidth() and getMeasuredHeight() to get the actual size of your component.
Except, and it’s starting to get repetitive, but it doesn’t work.
Turns out if you use measure(0, 0), which is the only thing to use when you have no info on the size, it will give you the minimum size of the component.
This causes a bug where, for example, a 400x200 container adds a 200x200 component to itself. Except now the minimum size of the container is 200x200 and so it now, in the middle of layouting, it thinks it’s 200x200. That’s problematic.
The only fix I found is to redundantly store the size of component within Capy. Usually this would mean that in the case where a component has a minimum size it would be incorrect, but Android views do not have a minimum size so we’re good.
Actually doing something
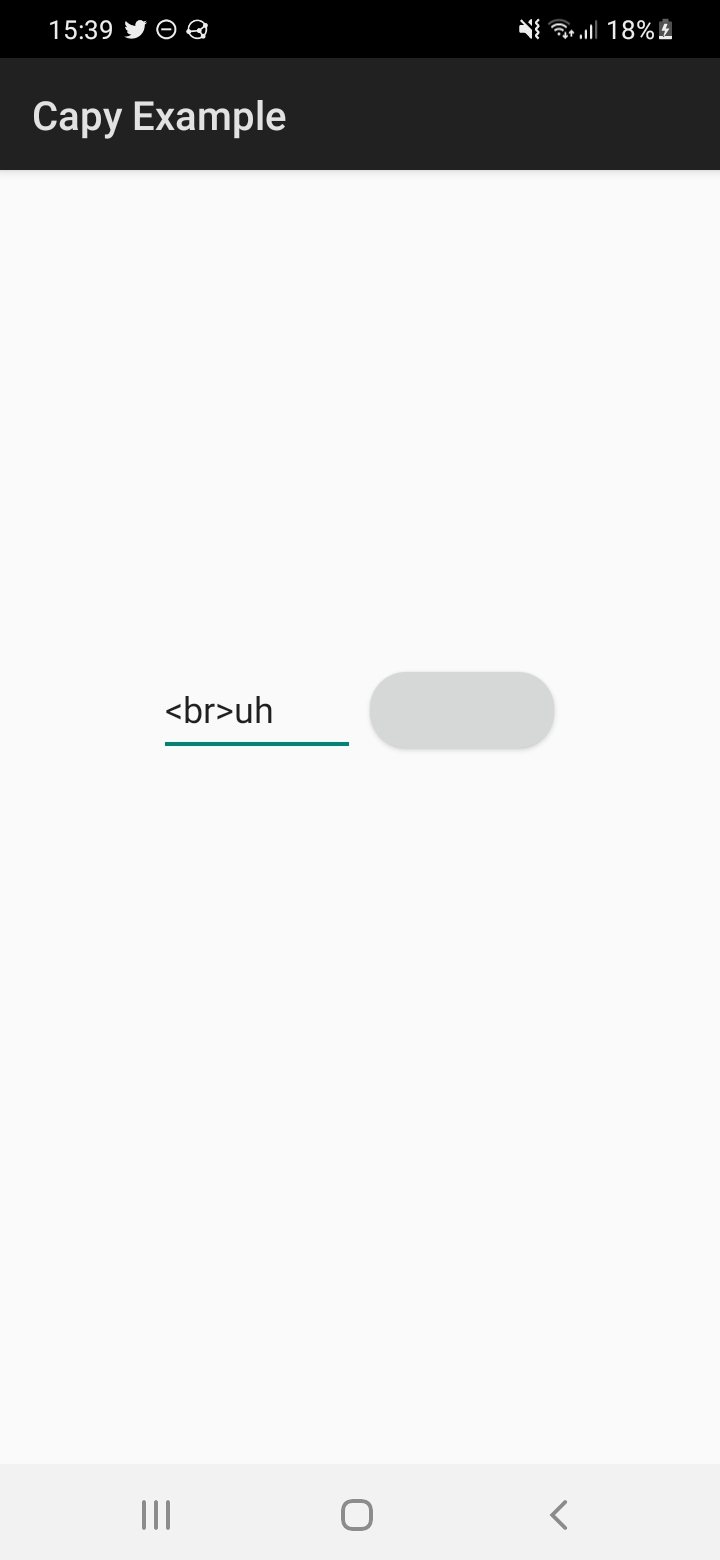
So far, we’ve been able to show Android views. We can put labels, editable text views, containers, buttons and more. However we’ve only done one part of what we need to do. The biggest thing missing is event listeners.
An event listener is a function that gets called whenever something eventful happens. For example, if a button is clicked, the onClick listener will be called. If a text field has been edited, the onChangedText listener will be called. And so on.
What this means in practice is that event listeners are what are used to create interactivity in applications.
The solution I originally came up with (but didn’t have the time to implement) was to define a Java class for listener type we need. Which means a Java class
for onClick, a Java class for onMouseMotion, and a Java class for every one of the dozen or so of event listeners. Clearly, this is cumbersome and tedious to maintain.
Fortunately, desttinghim had the idea to use a Java feature named InvocationHandler. Like said in the name, InvocationHandler is a Java class that can be put as an handler for anything that can be invoked. Using java.lang.reflect.Proxy, the InvocationHandler can be cast into any one-method class we want. By combining this with other tricks, this means we can use 1 Java class for all our event listeners needs!
Using this, we get interactivity!
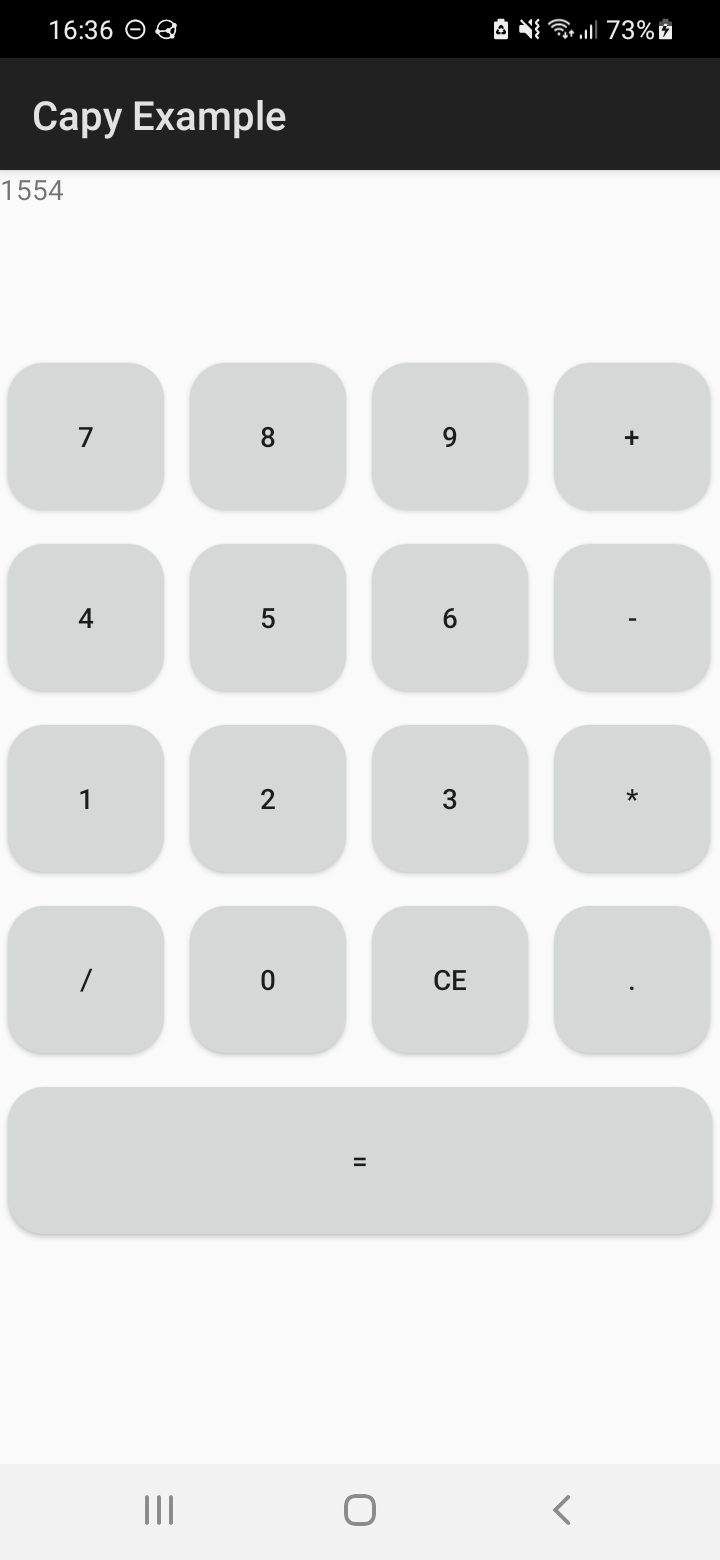
And then all that is left to do is just to implement other components. This is quite repetitive so I will not expand details on how each component was ported to Capy.
But now, we can compile some Capy applications and they work on Android!