Capy -- 2024 Recap
by zenith391
Reminder: Capy is NOT ready for use in production as I’m still making breaking changes
Capy is a GUI framework for Zig made with performance, cross-compilation and native widgets in mind. The goal is to be able to seamlessly cross-compile from any platform to any other one. This includes Windows, Linux, WebAssembly, and soon will include macOS, Android and iOS.
AnimationController
The animation system for Atom has been remade.
It now requires an AnimationController
which is used to periodically update the Atom.
Previously, this was implemented using global variables, but using global variables had two problems: it couldn’t synchronise the animation with the window’s refresh rate, and due to that, animations worked at the maximum speed the CPU could allow, which meant Capy maximized one CPU core for animations !
Now, animations don’t hog CPU cores anymore while also looking more smooth. The tradeoff means that the new syntax for animating atoms is now:
atom.animate(
  animation_controller,
  capy.Easings.InOut, // easing
  capy.Colors.red,    // target value
  1000                // duration in milliseconds
);
API Reference (!)
Capy now has an API reference which is auto-generated by Zig itself. This piece
of documentation has been long overdue, but I couldn’t add the API reference as, at first, I
encountered compiler errors, which have now been fixed thanks to the latest compiler updates. And
then, the API reference simply wouldn’t use the capy module as its main page, which meant that
all the functions and structs couldn’t be discovered on the API reference, which kind of defeated
its purpose.
The fix to that ended up being renaming src/main.zig to src/capy.zig, as the new documentation
generator in Zig silently expects this naming convention.
Improvements to Label
The component can now use different fonts in different sizes using the new TextLayout
struct. This allows for more complex typography for Capy applications.
Userdata
See the many-counters.zig example.
This system allows for each component to hold their state or their data.
In the following example, it’s used to hold the count for each counter widget:
//! This is a test for Capy's ease of use when using lists of many items
const capy = @import("capy");
const std = @import("std");
pub usingnamespace capy.cross_platform;

const CounterState = struct {
    count: capy.Atom(i64) = capy.Atom(i64).of(0),
};

fn counter() anyerror!*capy.Alignment {
    var state1 = try capy.internal.lasting_allocator.create(CounterState);
    state1.* = .{};
    const format = try capy.FormattedAtom(capy.internal.lasting_allocator, "{d}", .{&state1.count});

    return capy.alignment(
        .{},
        (try capy.row(.{}, .{
            capy.button(.{
                .label = "-",
                .onclick = (struct {
                    fn sub(pointer: *anyopaque) !void {
                        const button: *capy.Button = @ptrCast(@alignCast(pointer));
                        const state: *CounterState = button.getUserdata(CounterState).?;
                        state.count.set(state.count.get() - 1);
                    }
                }).sub,
            }),
            capy.textField(.{ .text = "0", .readOnly = true })
                .bind("text", format),
            capy.button(.{ .label = "+", .onclick = struct {
                fn add(pointer: *anyopaque) anyerror!void {
                    const button: *capy.Button = @ptrCast(@alignCast(pointer));
                    const state: *CounterState = button.getUserdata(CounterState).?;
                    state.count.set(state.count.get() + 1);
                }
            }.add }),
        }))
            .addUserdata(CounterState, state1),
    );
}

pub fn main() !void {
    try capy.init();
    defer capy.deinit();

    var window = try capy.Window.init();
    try window.set(capy.column(.{}, .{
        capy.column(.{ .name = "counters-column" }, .{
            counter(),
        }),
    }));

    window.show();
    capy.runEventLoop();
}
Monitor and Fullscreen API
Capy now has an API for handling monitors. It currently handles monitor names, sizes, and most importantly, the list of video modes a monitor supports. This can be used to set windows fullscreen, be it in borderless maximized mode or in exclusive fullscreen mode (the one that allows you to change the monitor’s resolution).
Progress on the macOS backend
Thanks to effort by geon, the macOS backend has tremendously progressed
in the past month. Up until the start of October, the macOS backend could only show an empty window.
Now it can already run small examples (like the border-layout example).
Grid Layout
Before now, Capy used to only support few layout algorithms: Row, Column and Stack. The
problem is this set only allows for simple layouts, given that Row and Column are essentially
akin to flex boxes (with a few features missing) and Stack is just Z-ordering.
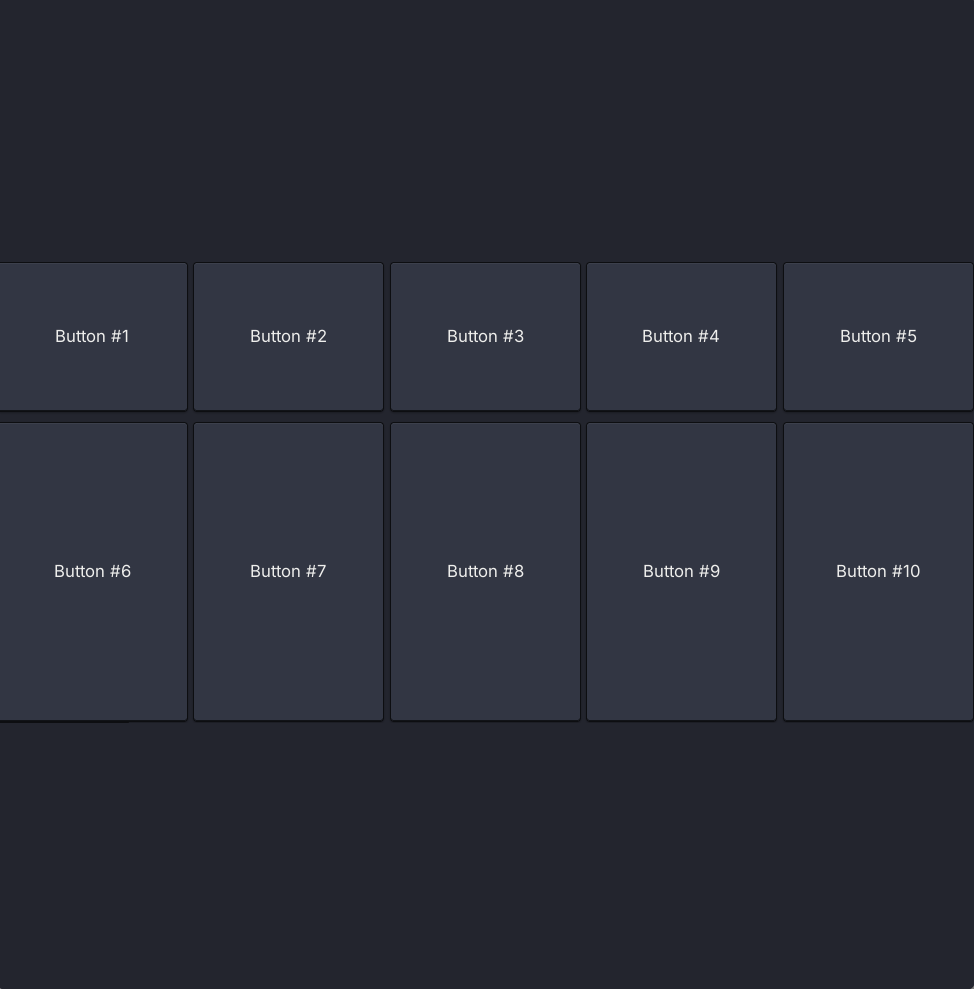
Hence, a new layout was introduced: the grid layout. Its implementation in Capy is based on CSS Grid Layout, which is a flexible and expressive API that has the advantage of being familiar to most developers.
Capy’s implementation isn’t an exact copy of this (as the way styling and layouting happens is different from CSS), but shares a lot of similarities with it. Nonetheless, a picture’s worth a thousand words:

const grid = try capy.grid(.{
    .template_columns = &([_]capy.GridLayoutConfig.LengthUnit{.{ .fraction = 1 }} ** 5),
    .template_rows = &.{ .{ .pixels = 150 }, .{ .pixels = 300 } },
    .column_spacing = 5,
    .row_spacing = 10,
}, .{});
// add buttons to grid
// ...
// display the grid on the window
try window.set(
    // by default, capy.alignment centers the given component.
    capy.alignment(.{},
        grid
    )
)
As the features are similar to CSS Grid, I recommend Josh W. Comeau’s tutorial for an introduction to its capabilities. The only feature that’s been intentionally ommited are grid template areas.
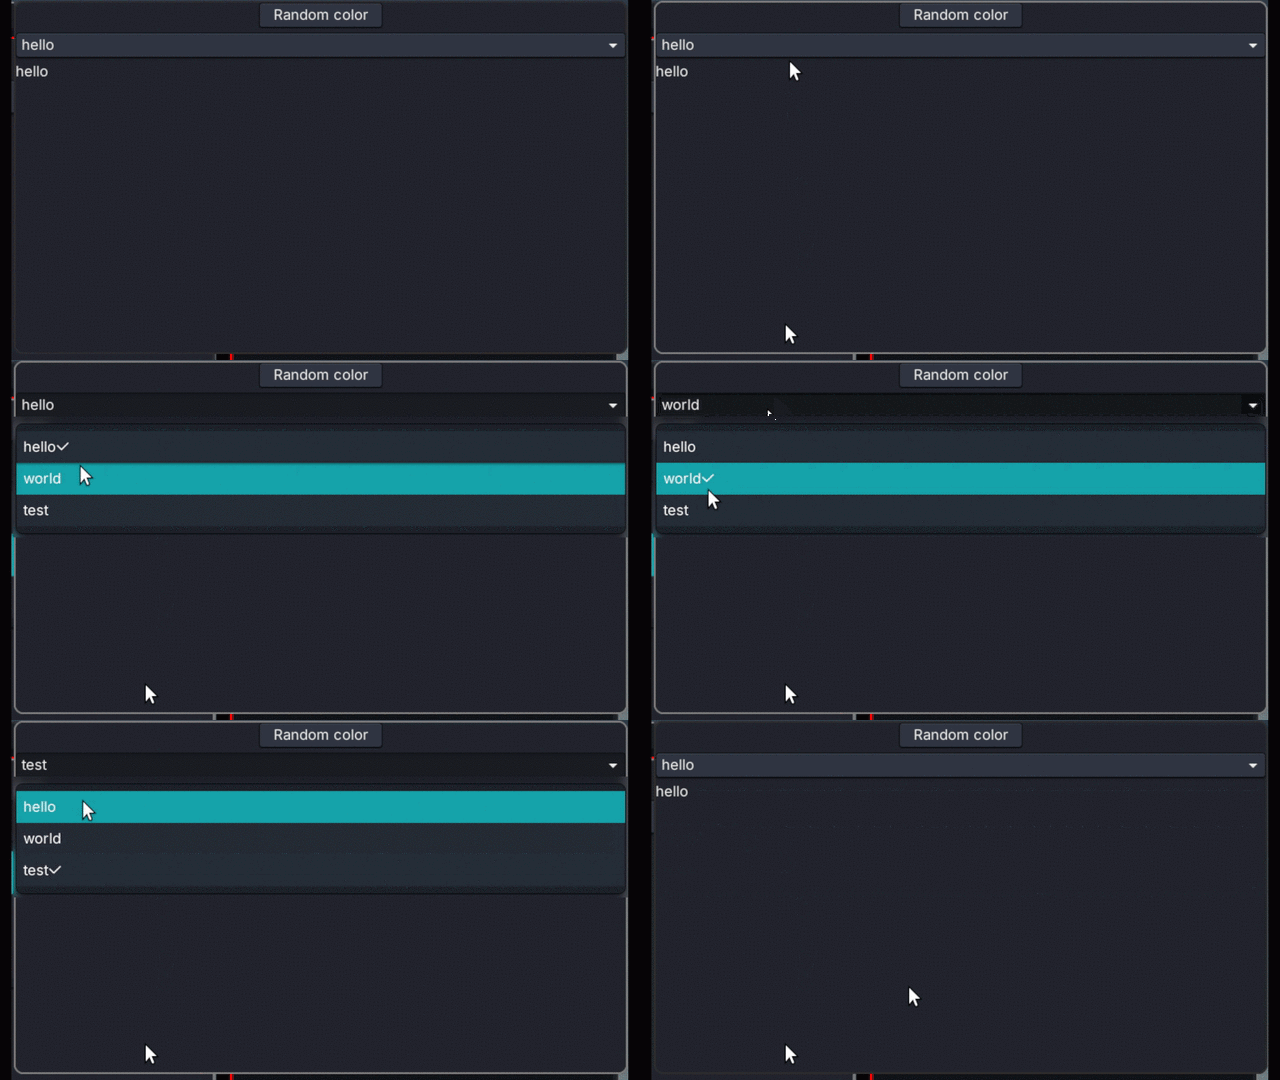
Added Dropdown component

The above example was made with
const selectedValue = capy.Atom([]const u8).alloc("");
defer selectedValue.deinit();

try window.set(capy.column(.{}, .{
    capy.dropdown(.{
        .values = &.{ "hello", "world", "test" },
    })
    .bind("selected_value", selectedValue),

    capy.label(.{})
    .bind("text", selectedValue),
}));
window.show();
Progress on the WebAssembly backend
The WebAssembly backend has also been enhanced. Most efforts have been in bug fixing.
- Fixed
Canvason high-DPI screens. This means the osm-viewer example now properly works on screens with high-DPI. - Add support for
TextField.read_onlyandButton.enabled - Add support for
Window.on_frame